5/17/2016 NOTE: There is a newer, updated version of this blog post where I recommend a different plugin. Please view that here: How to Add a Pinterest Hover Button to WordPress Images
The developer of the plugin listed in this blog post below has stopped updating the plugin and stopped responding to support requests. So I now recommend the plugin listed in the above blog post.
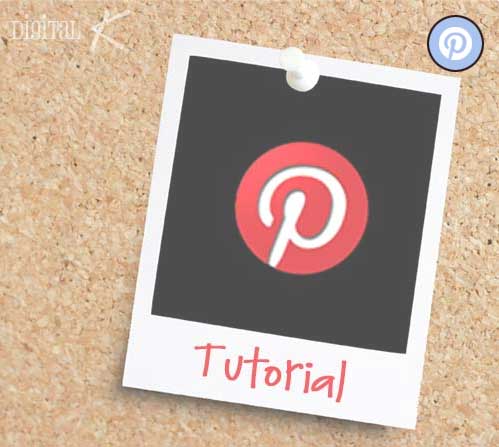
Want to make it quick and easy for your blog visitors to Pin your images? You can – by adding a Pinterest hover button to your blog images! A “hover button” is a button that appears when you put your mouse pointer over an image. Go ahead and test it out on this image below. Clicking on the Pinterest button that appears in the top right corner will allow you to pin this image to your Pinterest boards.

Here are the instructions for WordPress self-hosted (aka wordpress.org) blogs. For Blogger blogs, see this post: How to Add a Pinterest Hover Button to your Blogger Images.
Add a Pinterest Hover Button to WordPress:
- Install and activate the “Pinterest Pin It Button for Images” WordPress plugin.
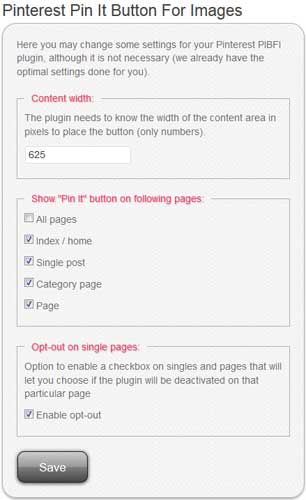
- To change any of the plugin’s default settings: select Settings > Pinterest Pin It in your WordPress Dashboard. I changed my content width to match the width of the area in my blog where my article content goes (excluding my sidebar). You can also select which types of pages and posts you want the Pinterest Hover button to appear on:

Now view one of your blog posts and you should see a red Pin It button appear on top of your images when you put your mouse pointer over an image. You can call it quits now — or we can customize things a bit…
Use a Custom Pin It Image:
- Download a Pinterest Icon to your computer or create your own. (You can get Free Pinterest Buttons for your Blog here – and new winter colors here!)
- Upload that image to the plugin’s directory on your blog:
/wp-content/plugins/pinterest-pin-it-button-for-images/ - Now you need to edit the plugin’s code so that it uses your custom image. In your WordPress Dashboard, select Plugins > Editor.
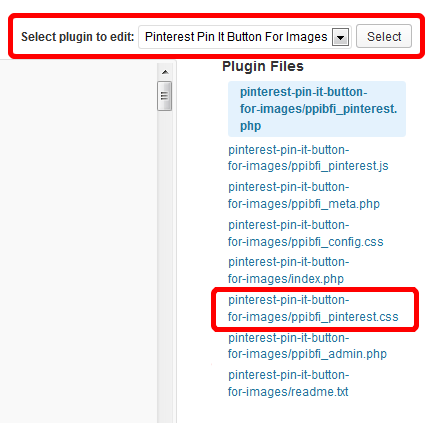
- In the top right corner, select the “Pinterest Pin It Button for Images” plugin from the drop-down list and then click the Select button. Then click on the pinterest-pin-it-button-for-images/ppibfi_pinterest.css file.

- On the left side of your screen, you will now see the code for that file. Scroll down until you find this line of code:
.pibfi_pinterest .xc_pin { - Change the width and height values to match the width and height of your custom image. (Mine is 57 x 57.) And change the background-image file name from “ppibfi_button.png” to the file name of your custom image. (Mine is dk-pinterest-hover.png):

- Click the “Update File” button to save your changes.
Change the Position of the Pin It Button:
- You can also change the position of the hover image. Follow steps #3-5 above for using a custom Pin It image.
- Edit the top and margin-left values. By default the hover image will appear 5px down and 1px over to the left of the top right corner of your blog image. Increasing the top value will move the hover image down further and decreasing the margin-left value will move the hover image further to the left. (I changed my top value to 15px and my margin-left value to -15px.)

- Click the “Update File” button to save your changes.


Hi. I am having a hard time finding step #2’s location: Upload that image to the plugin’s directory on your blog:
/wp-content/plugins/pinterest-pin-it-button-for-images/
I looked and am not sure where that is in my wordpress?
Hi Hollie,
You’ll need to use an FTP program to find that directory. You can see it from your WordPress admin area.
It worked! It worked! Thank you. :))
Glad to hear it!
HI Kelly,
Can you please explain where to ‘Upload that image to the plugin’s directory on your blog:
/wp-content/plugins/pinterest-pin-it-button-for-images/’ All other things are done 🙂
Hi Barbara,
To upload the image to that directory, you’ll need to connect to your blog using FTP or some other type of file manager. (You can’t upload it to that directory through the WordPress Admin area.)
Love this. I’ve been seeing it on blogs out there, but I wasn’t sure what plugin was handling it. I’ve got it working on my blog now.
Thanks!
Great! Glad you got it working!
anyone have an opinion on how to stop Pinning to the image directly?
I’m not sure what you’re asking, Jim. Can you please explain further?
Hey Kelly-
this is a great post– but I noticed that the plugin you are using has not been updates in quite some time.
Are you are at all worried about future compatibility or security issues when using this plugin?
Thanks
Peter
Yes, that is always a concern when using plugins. I always try to choose plugins that have been updated recently and that offer timely responses to their support forums.
The thing I don’t like about this plugin is that it defaults the pin title to the post title…which doesn’t always work, especially if there’s multiple recipes on a post…y’know? Any way to get around this? I’d rather it pin the title of the image, not the title of the post!
Sarah, here’s some code for doing that: http://wordpress.org/support/topic/display-the-title-of-the-image
Great tutorial! thank you for sharing! But I am having trouble getting my custom designed button to work. While i’ve edited the css for the plugin at the top in ( ) in says inactive…how can i active the css for the plugin?! Im stumped.
Hi Lauren,
You have to make sure you activate the plugin: Go to the Plugins area of your dashboard and then activate that plugin.
anyway to send pins or imagenes automatically to my pinterest profile from my posts?
Hi Leiva,
There isn’t any way to auto-publish to Pinterest, that I’m aware of.
Thanks for your tutorial! It was very helpful!!!
This plug in works great. Now I just need to find a way to change the description (other than to post name) and it will be exactly what I was looking for. Thanks for the Pinterest icon, can’t wait to get the file to make it custom.
Thanks for Custom Pin It Image, now I’ll edit the plugin
I’ve tried this but I can’t get it to work. I’ve followed it all to a tee and double checked everything. Thoughts?
Hi Ceecee. Without seeing how you have your website and plugin setup, it’s difficult for me to tell you what needs to be changed. If you want me to fix it for you, you can click the $29 Pay Now button above and I can help you further.
Thanks a lot my dear,i did it