Are you a blogger who is active on Pinterest? If so – you can showcase your Pinterest profile on your blog’s sidebar (or even your blog’s footer!) – and hopefully gain some new Pinterest followers in the process! In this blog article I share instructions for how to do this on both a self-hosted WordPress blog (aka wordpress.org) as well as on Blogger.
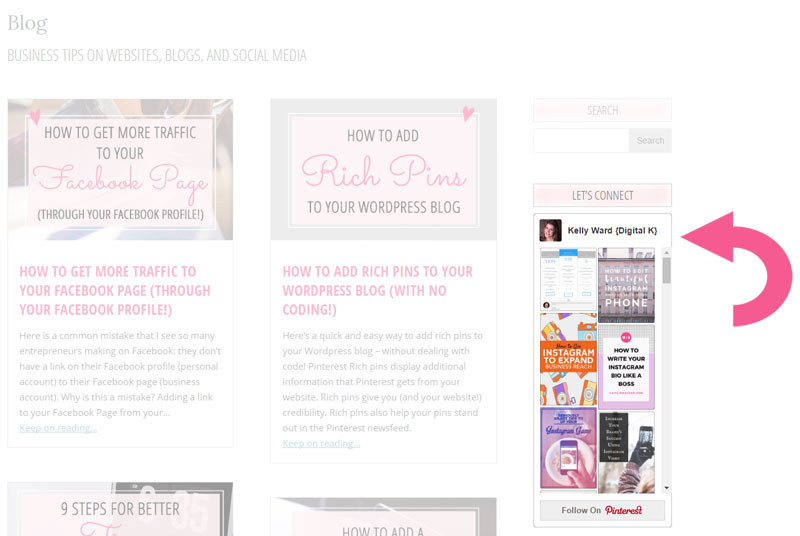
Pinterest makes it very easy to add a profile widget to your blog. Their widget will show a box with your profile pic and name at the top, your most recent pins, and a Follow button at the bottom. Here’s how it looks in a blog sidebar:
So let’s get to it!
Step 1: Build Your Pinterest Profile Widget
- Go to Pinterest’s Widget Builder here: https://developers.pinterest.com/tools/widget-builder/
- Select the Profile Widget
- Enter the link to your Pinterest account in the “Pinterest user URL” box
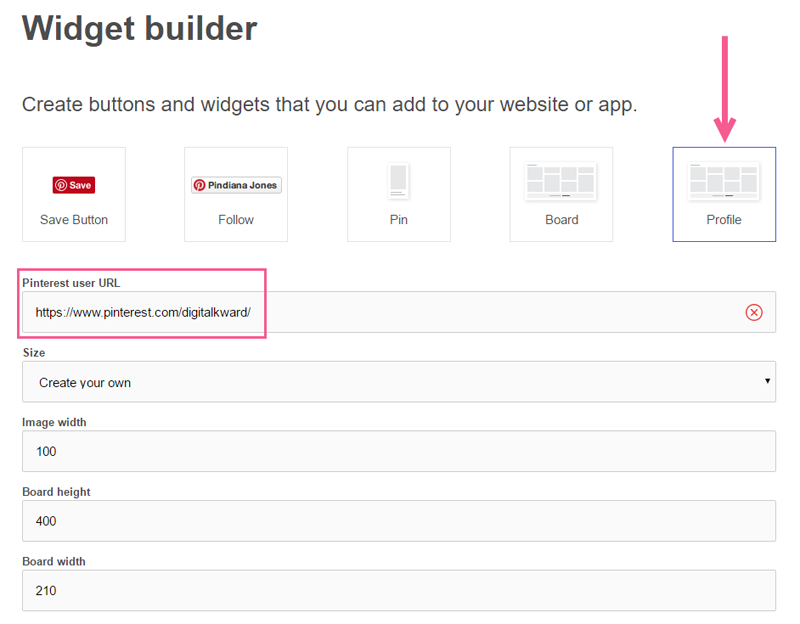
- Select the widget Size. Depending on the size of your blog’s sidebar (or footer), the “Square” or the “Sidebar” options may work for you. Otherwise you can select “Create your own” and then enter in the widget’s height and width (the “Board height” and “Board width” boxes), as well as the width of each of the pin images within the widget (the “Image width” box). Underneath the Size boxes, you will see a preview of how your widget will look with those sizes.
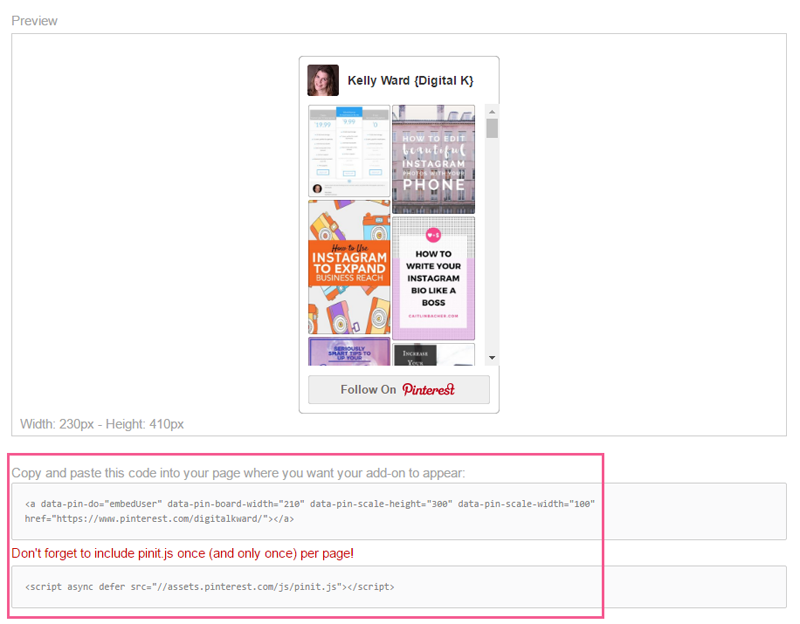
- Scroll down below the preview and you will see 2 boxes with code. Keep this browser window open so you can copy that code in Step 2 below.
Step 2: Add Your Pinterest Profile Widget to your Blog’s Sidebar
Now we can add the code from Step 1 above to your blog’s sidebar. Open a new browser window and login to your blog. Then follow these instructions to add the code to your sidebar:
- Add your Pinterest Profile to your WordPress Sidebar
- Add your Pinterest Profile to your Blogger Sidebar
How to Add your Pinterest Profile to your WordPress Sidebar
Note: These instructions are for self-hosted WordPress blogs (aka “WordPress.org blogs”) — not WordPress.com blogs.
- In your WordPress Admin area, select Appearance > Widgets
- Drag a new Text widget to your blog’s sidebar (or to your footer widget – or any other widget setup in your blog’s theme)
- Optionally enter in a title (heading) for your Widget.
- Copy the 2 blocks of code from Step 1 above and paste them into your Text widget.
Note: the second block of code should only be used ONE TIME on your website page. So if you have already placed that code on your web page (or your website’s header or footer), do NOT paste it again into this widget. For example, if you have already added Pinterest’s Follow button to your website, you have already pasted that line of code into your website and should not paste it again here. - Click the Save button.
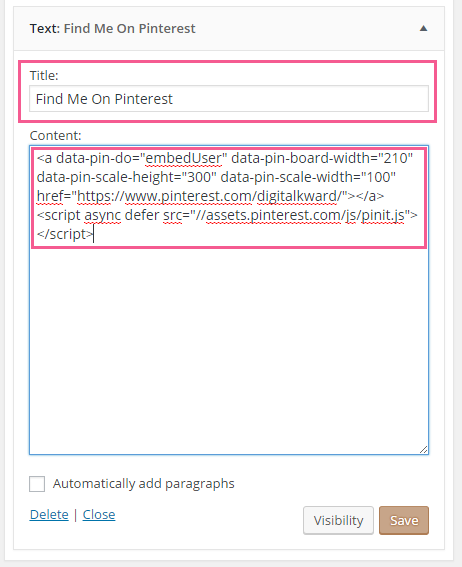
- Look at your blog and see if you need to adjust the size or alignment of the widget to better fit in your sidebar.
- If you need to change the size, you can go back to your widget and change the number values until it fits better. The “data-pin-board-width” and “data-pin-scale-height” values are the width and height of the entire widget. The “data-pin-scale-width” value is the width of the invididual pin images in the widget.
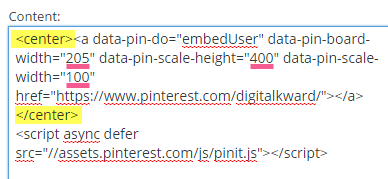
- If you want to center your widget, you can add <center> and </center> tags around the first section of code, as highlighted in yellow below.
How to Add your Pinterest Profile to your Blogger Sidebar
- In your Blogger Admin area, select Layout from the admin menu.
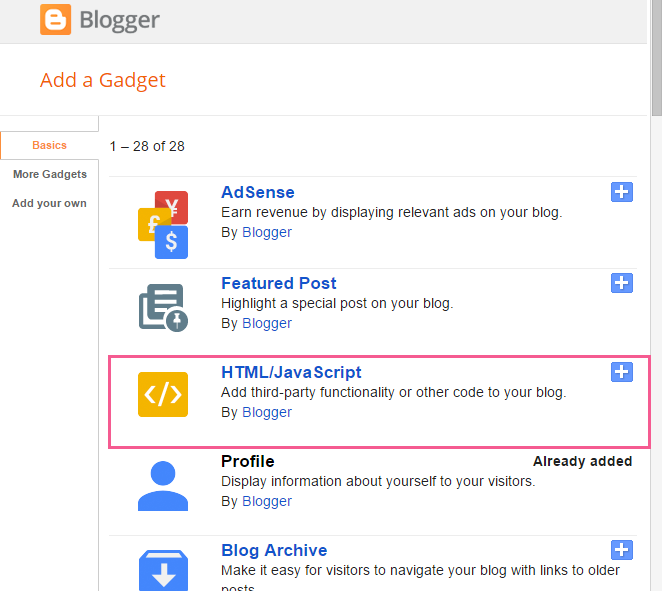
- Click Add a Gadget in your blog’s sidebar (or in your footer – or any other section setup in your blog’s layout)
- Select the HTML/JavaScript gadget
- Optionally enter in a title (heading) for your gadget.
- Copy the 2 blocks of code from Step 1 above and paste them into your Text widget.
Note: the second block of code should only be used ONE TIME on your website page. So if you have already placed that code on your web page (or your website’s header or footer), do NOT paste it again into this widget. For example, if you have already added Pinterest’s Follow button to your website, you have already pasted that line of code into your website and should not paste it again here. - Click the Save button.
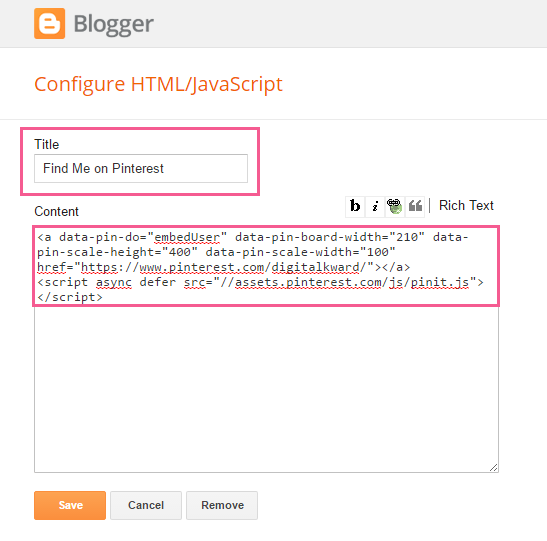
- Look at your blog and see if you need to adjust the size or alignment of the widget to better fit in your sidebar.
- If you need to change the size, you can go back to your gadget and change the number values until it fits better. The “data-pin-board-width” and “data-pin-scale-height” values are the width and height of the entire widget. The “data-pin-scale-width” value is the width of the invididual pin images in the widget.
- If you want to center your widget, you can add <center> and </center> tags around the first section of code, as highlighted in yellow below.

Don’t forget it… Pin it! 


Thank you! This is fabulous.
You’re very welcome!
This is by far the best and easiest tutorial I have come across! Thank you so much Kelly 🙂 Can’t wait to read your other posts for more help and inspiration 🙂
Awwww! Thank you! I really appreciate that!
Hi Kelly,
Thanks for the tutorial, it was very helpful! My own personal Pinterest images are not showing on my widget, any idea what I did wrong? Or does this step take time? Thank you!
Hi Bridget,
I can see your Pinterest profile on your blog. Are you still having problems with this? If so – can you explain in more detail what you want to show up?
Thank you! I accidentally deleted a lot of code on my blog so have to start my sidebar from scratch. This was very helpful! The Pinterest photos look blurry (on the link/widget) but I haven’t been able to find a solution to that. Your instructions were very helpful!